
How to Add a Secret AirTag to Your DJI Osmo Pocket 3
Using a DIY 3D Printed Magnetic Case

Kit Includes
DJI OSMO Pocket 3 ULTRA Airtag Case (no Airtag)
Positive/Ground/Jumper Wire
Heat Tape
What You'll Need
Apple AirTag (Available Here)
DIY Magnetic AirTag Case Kit (Available Here)
Tools Required: Small Screwdriver, Flush Cutters, and more listed below
Tools Needed
DIY Kit

Ready To Go Version

Ever wanted to keep track of your DJI Osmo Pocket 3? Well, you’re in luck! Today, I’m showing you how to equip your device with an AirTag using my DIY Magnetic AirTag Case. Whether you buy the ready-made version or decide to tackle the project yourself, this guide has you covered.
Prefer not to DIY? No problem! For those of you looking for convenience without the hassle, we offer a ready-made version of the Ultra Magnetic Case for the DJI Osmo Pocket 3. This pre-assembled case comes with an AirTag already integrated, ensuring your device is trackable right out of the box. Perfect for those who want to skip the assembly process and jump straight to enjoying their device with added peace of mind.
How-to Tutorial
Step 1: Decasing Your AirTag
First up, grab your flush cutters and small screwdriver. With the battery terminals in the 12:00 position, you’ll start by gently prying open the AirTag’s plastic casing by pressing in the 2:00 area.

This is the 2:00 position you’ll press into first.
You will push through the two pieces and work your way around the case. Be careful not to damage the internal components by pressing to far in, especially if it's a brand-new AirTag. There are 3 tabs inside that need to be pulled apart. Once open, remove the battery cover and set aside the battery. The battery cover can be thrown away; it won’t be needed. The speaker magnet might have come off. Don't worry; simply bend the plastic it’s adhered to and should come off. Set this aside as well and we’ll add it back later.
Step 2: Loosening the Speaker Coil

It’s crucial not to damage the speaker coil as it retains the AirTag's sound functionality. Flip over the airtag (white side) and use a heat gun to warm up the adhesive under the coil, watching for bubbling on the white plastic, which indicates it’s time to pry.

Gently work your way under the coil with a pry tool or your small screwdriver, being cautious not to tear or damage the coil. Protip: I like to get leverage underneath the coil anywhere and once I do I’ll completely rotate around and it’ll come loose.
Step 3: Cutting the Casing

Now, focus on the white plastic casing around the AirTag's board. Identify the three sections to cut through with your flush cutters—aim only to cut the casing, not the board itself. Next cut in between those initial cuts. Once cut, you can remove the board by gently bending the white plastic being careful not to bend the board.
Step 4: Prepping for Soldering

With the board free, clean off any residual glue and prepare the solder pads. You’ll need to remove the existing terminal connections carefully. This step is delicate—use your tools to gently twist and remove these pieces without damaging the underlying pads.

Step 5: Soldering
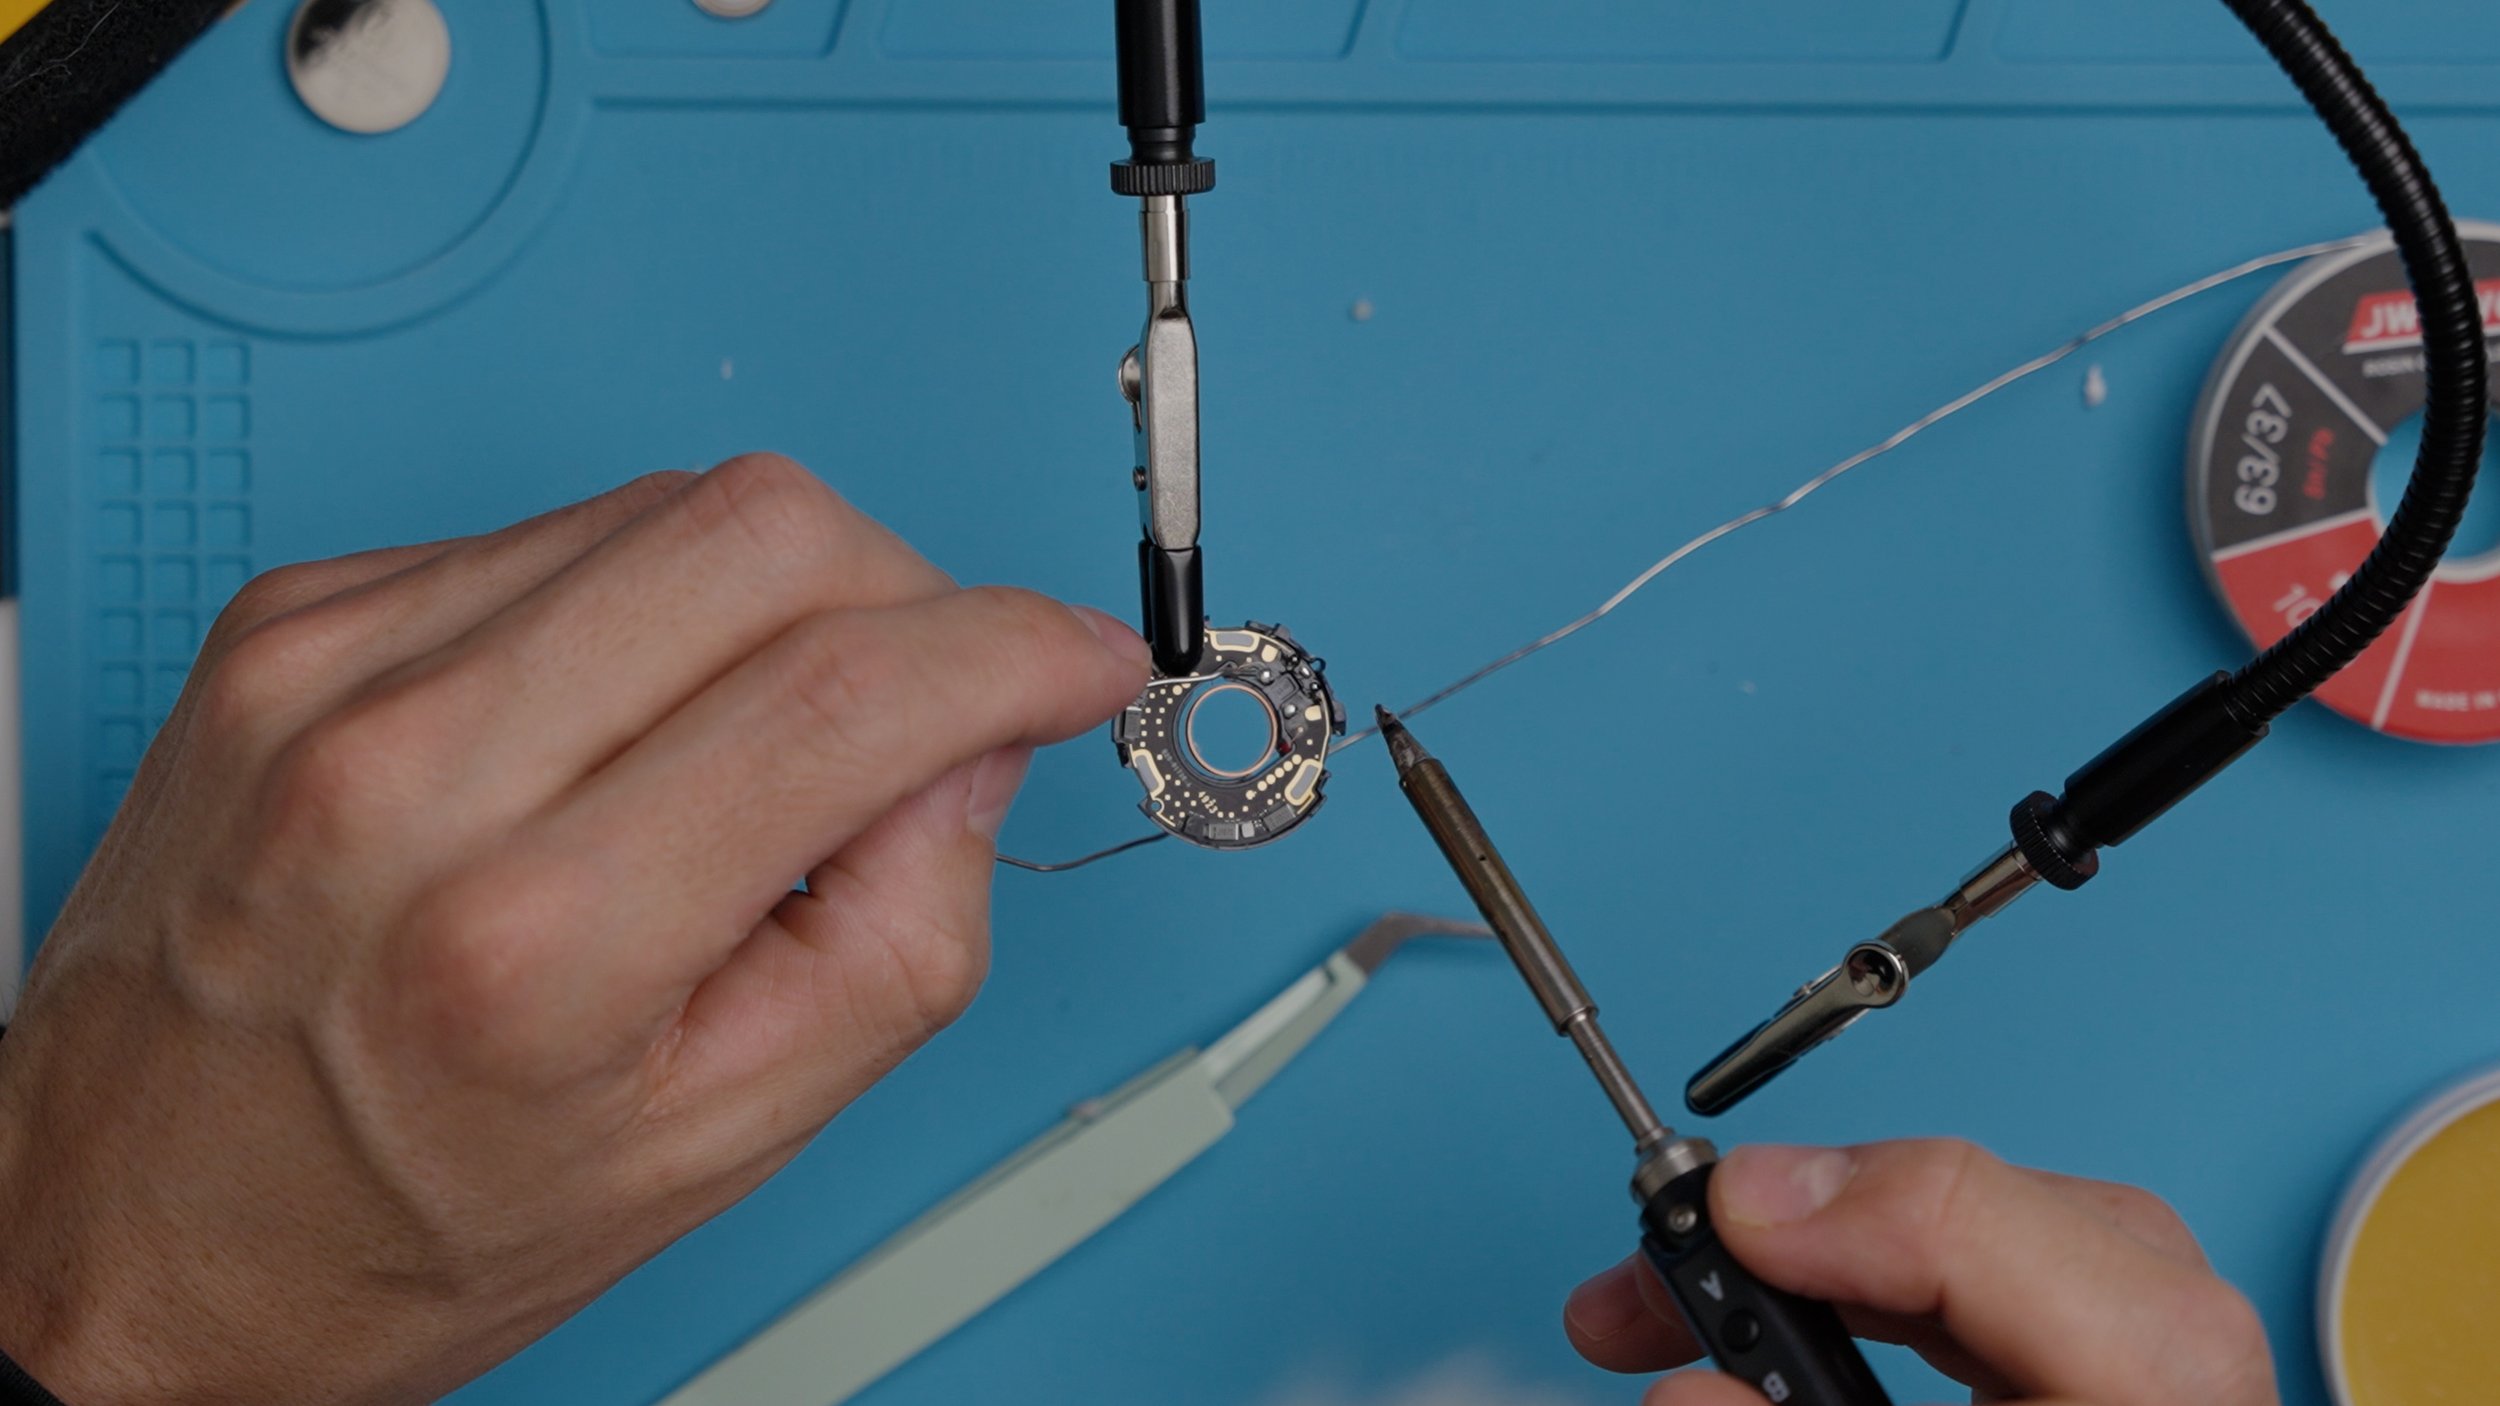
After tinning the wires and applying flux to the pads, start soldering the wires onto the designated pads. This process requires precision, so take your time to ensure a solid connection. Use the small positive red wire to connect the left and right positive pads while adding the longer red positive wire to either positive terminals. I connect to the right. Use the black negative wire to solder to the center pad.
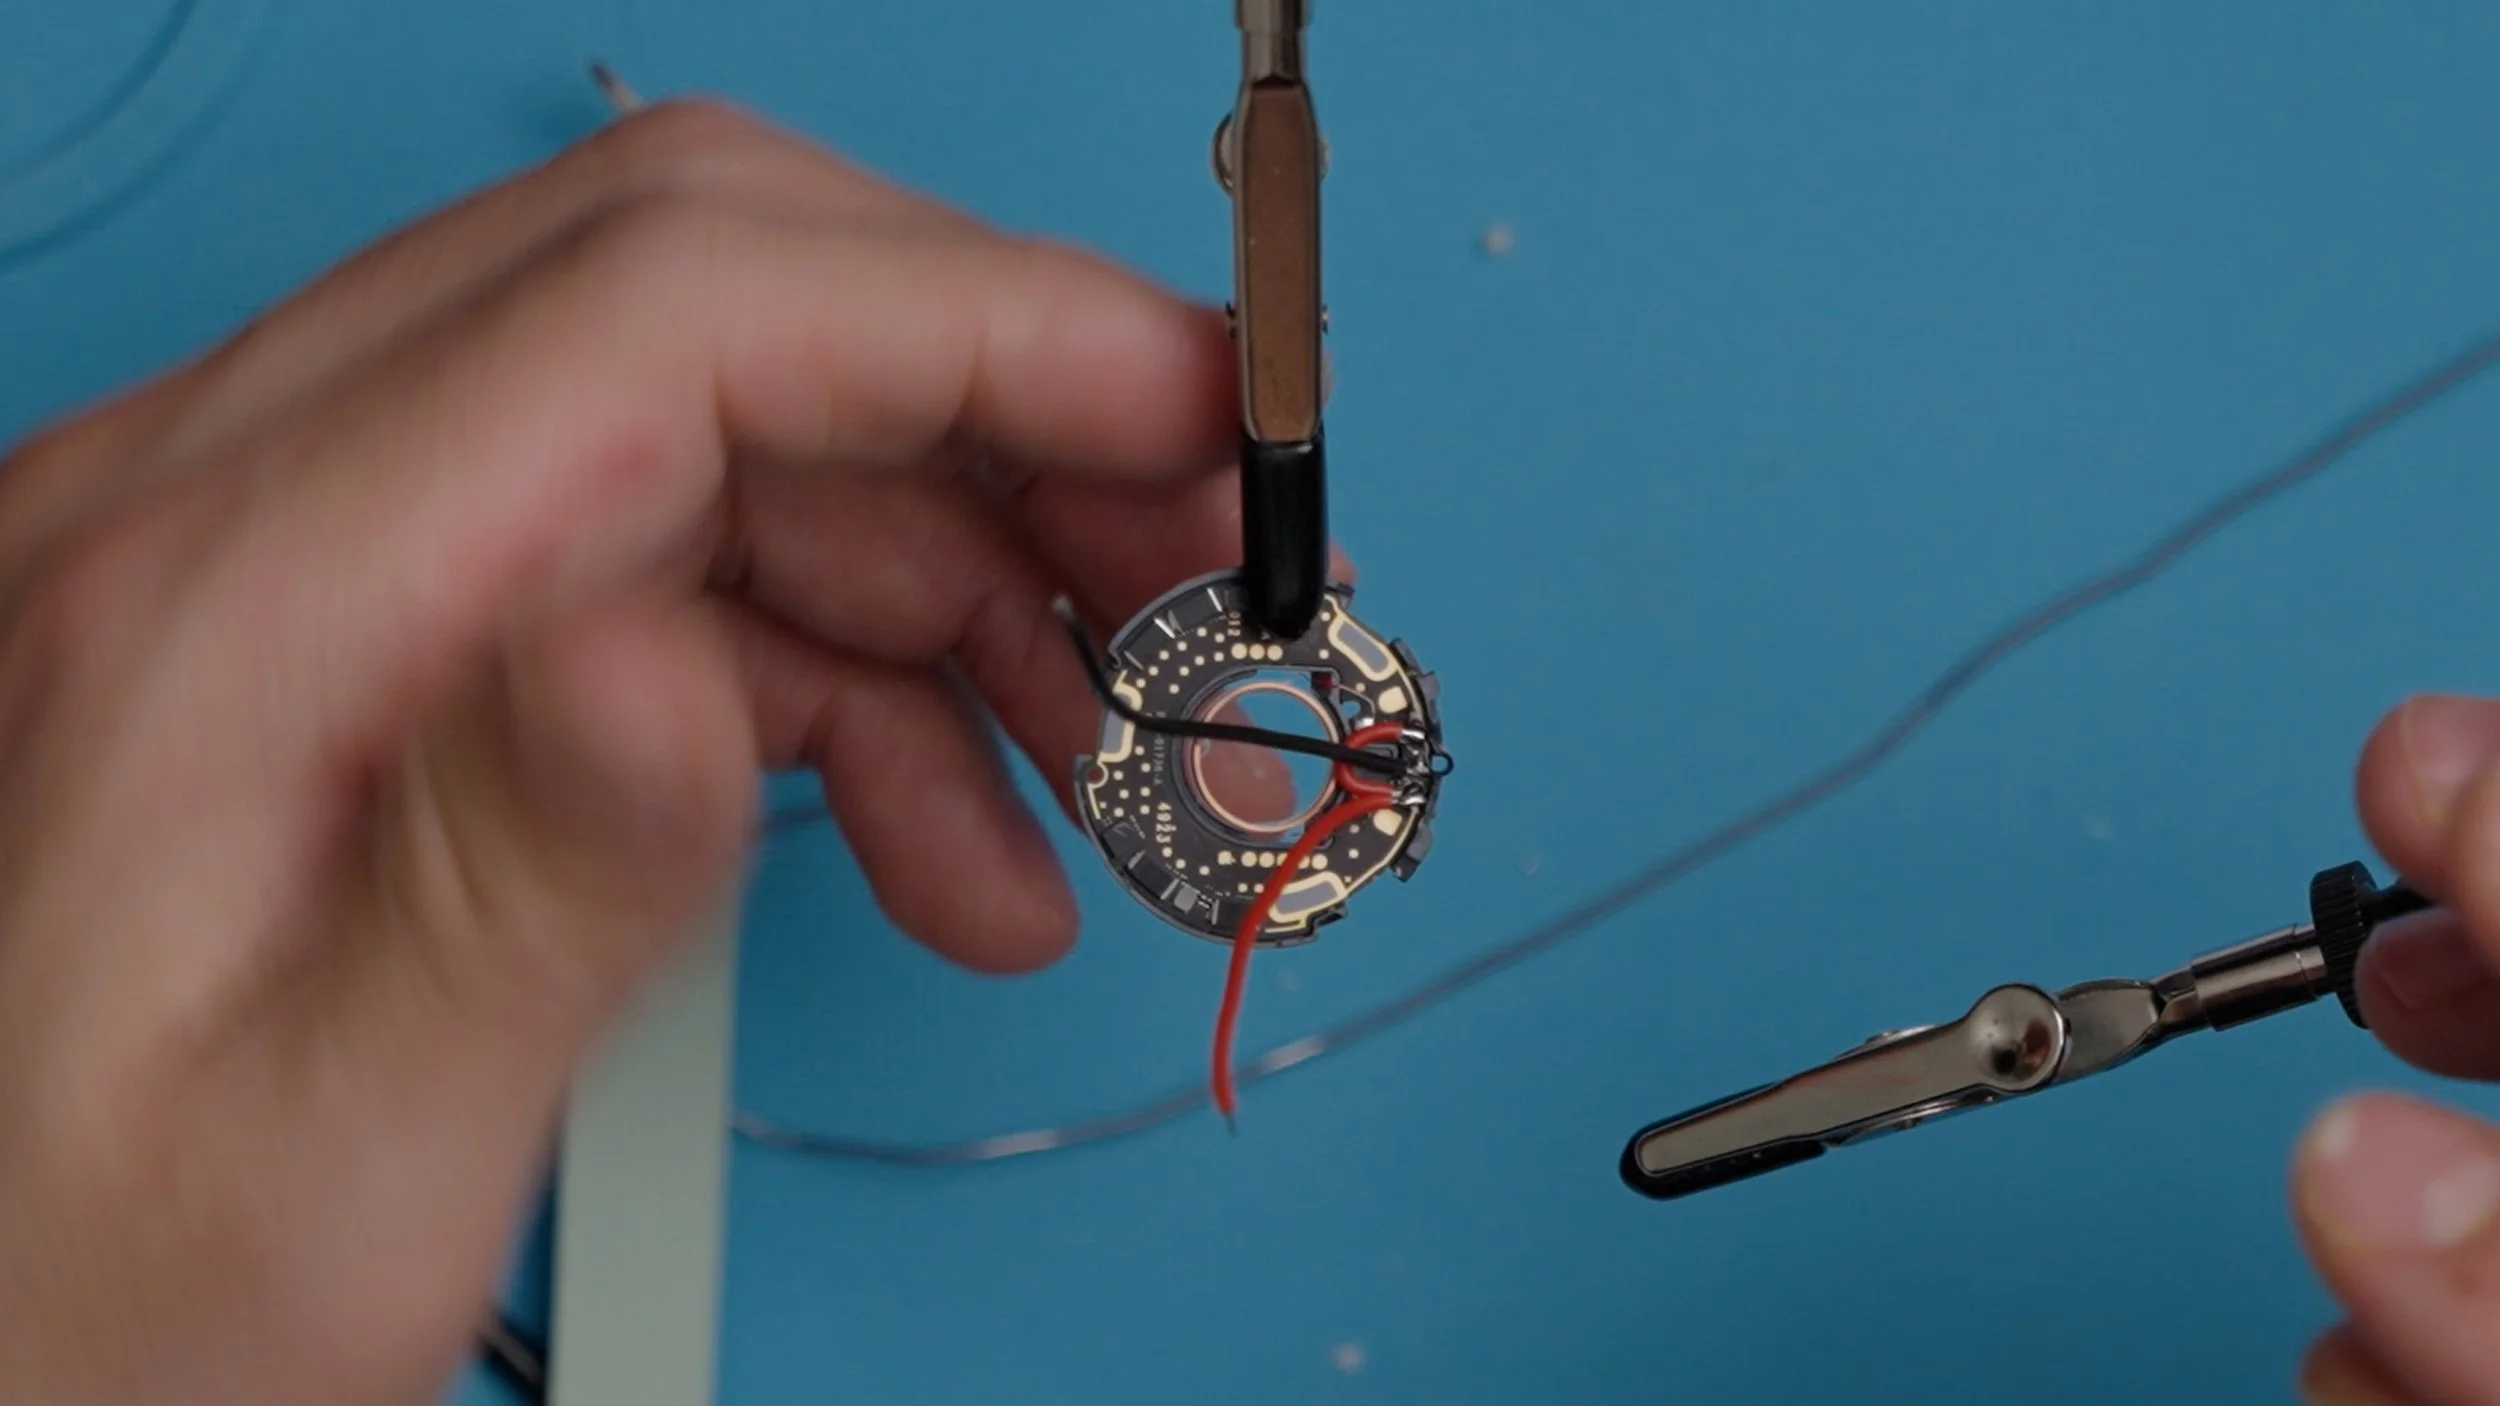
Step 6: Testing and Securing the Board

Before enclosing everything, connect the wires to the battery to test if the AirTag chimes, indicating a successful setup. Once confirmed, use provided heat tape to secure the wires on the batteries within the 3D-printed case. Use tiny bit of hot glue to secure the speaker magnet and ensure it stays in place
Step 7: Finishing Up

Place the AirTag into the DIY case, aligning all components. Bring your phone close to set up the AirTag to test that everything works as it should. Align and press the case parts togetheruntil they click securely. With the AirTag now embedded in your DJI Osmo Pocket 3, you’ll never have to worry about losing track of your device.

Conclusion
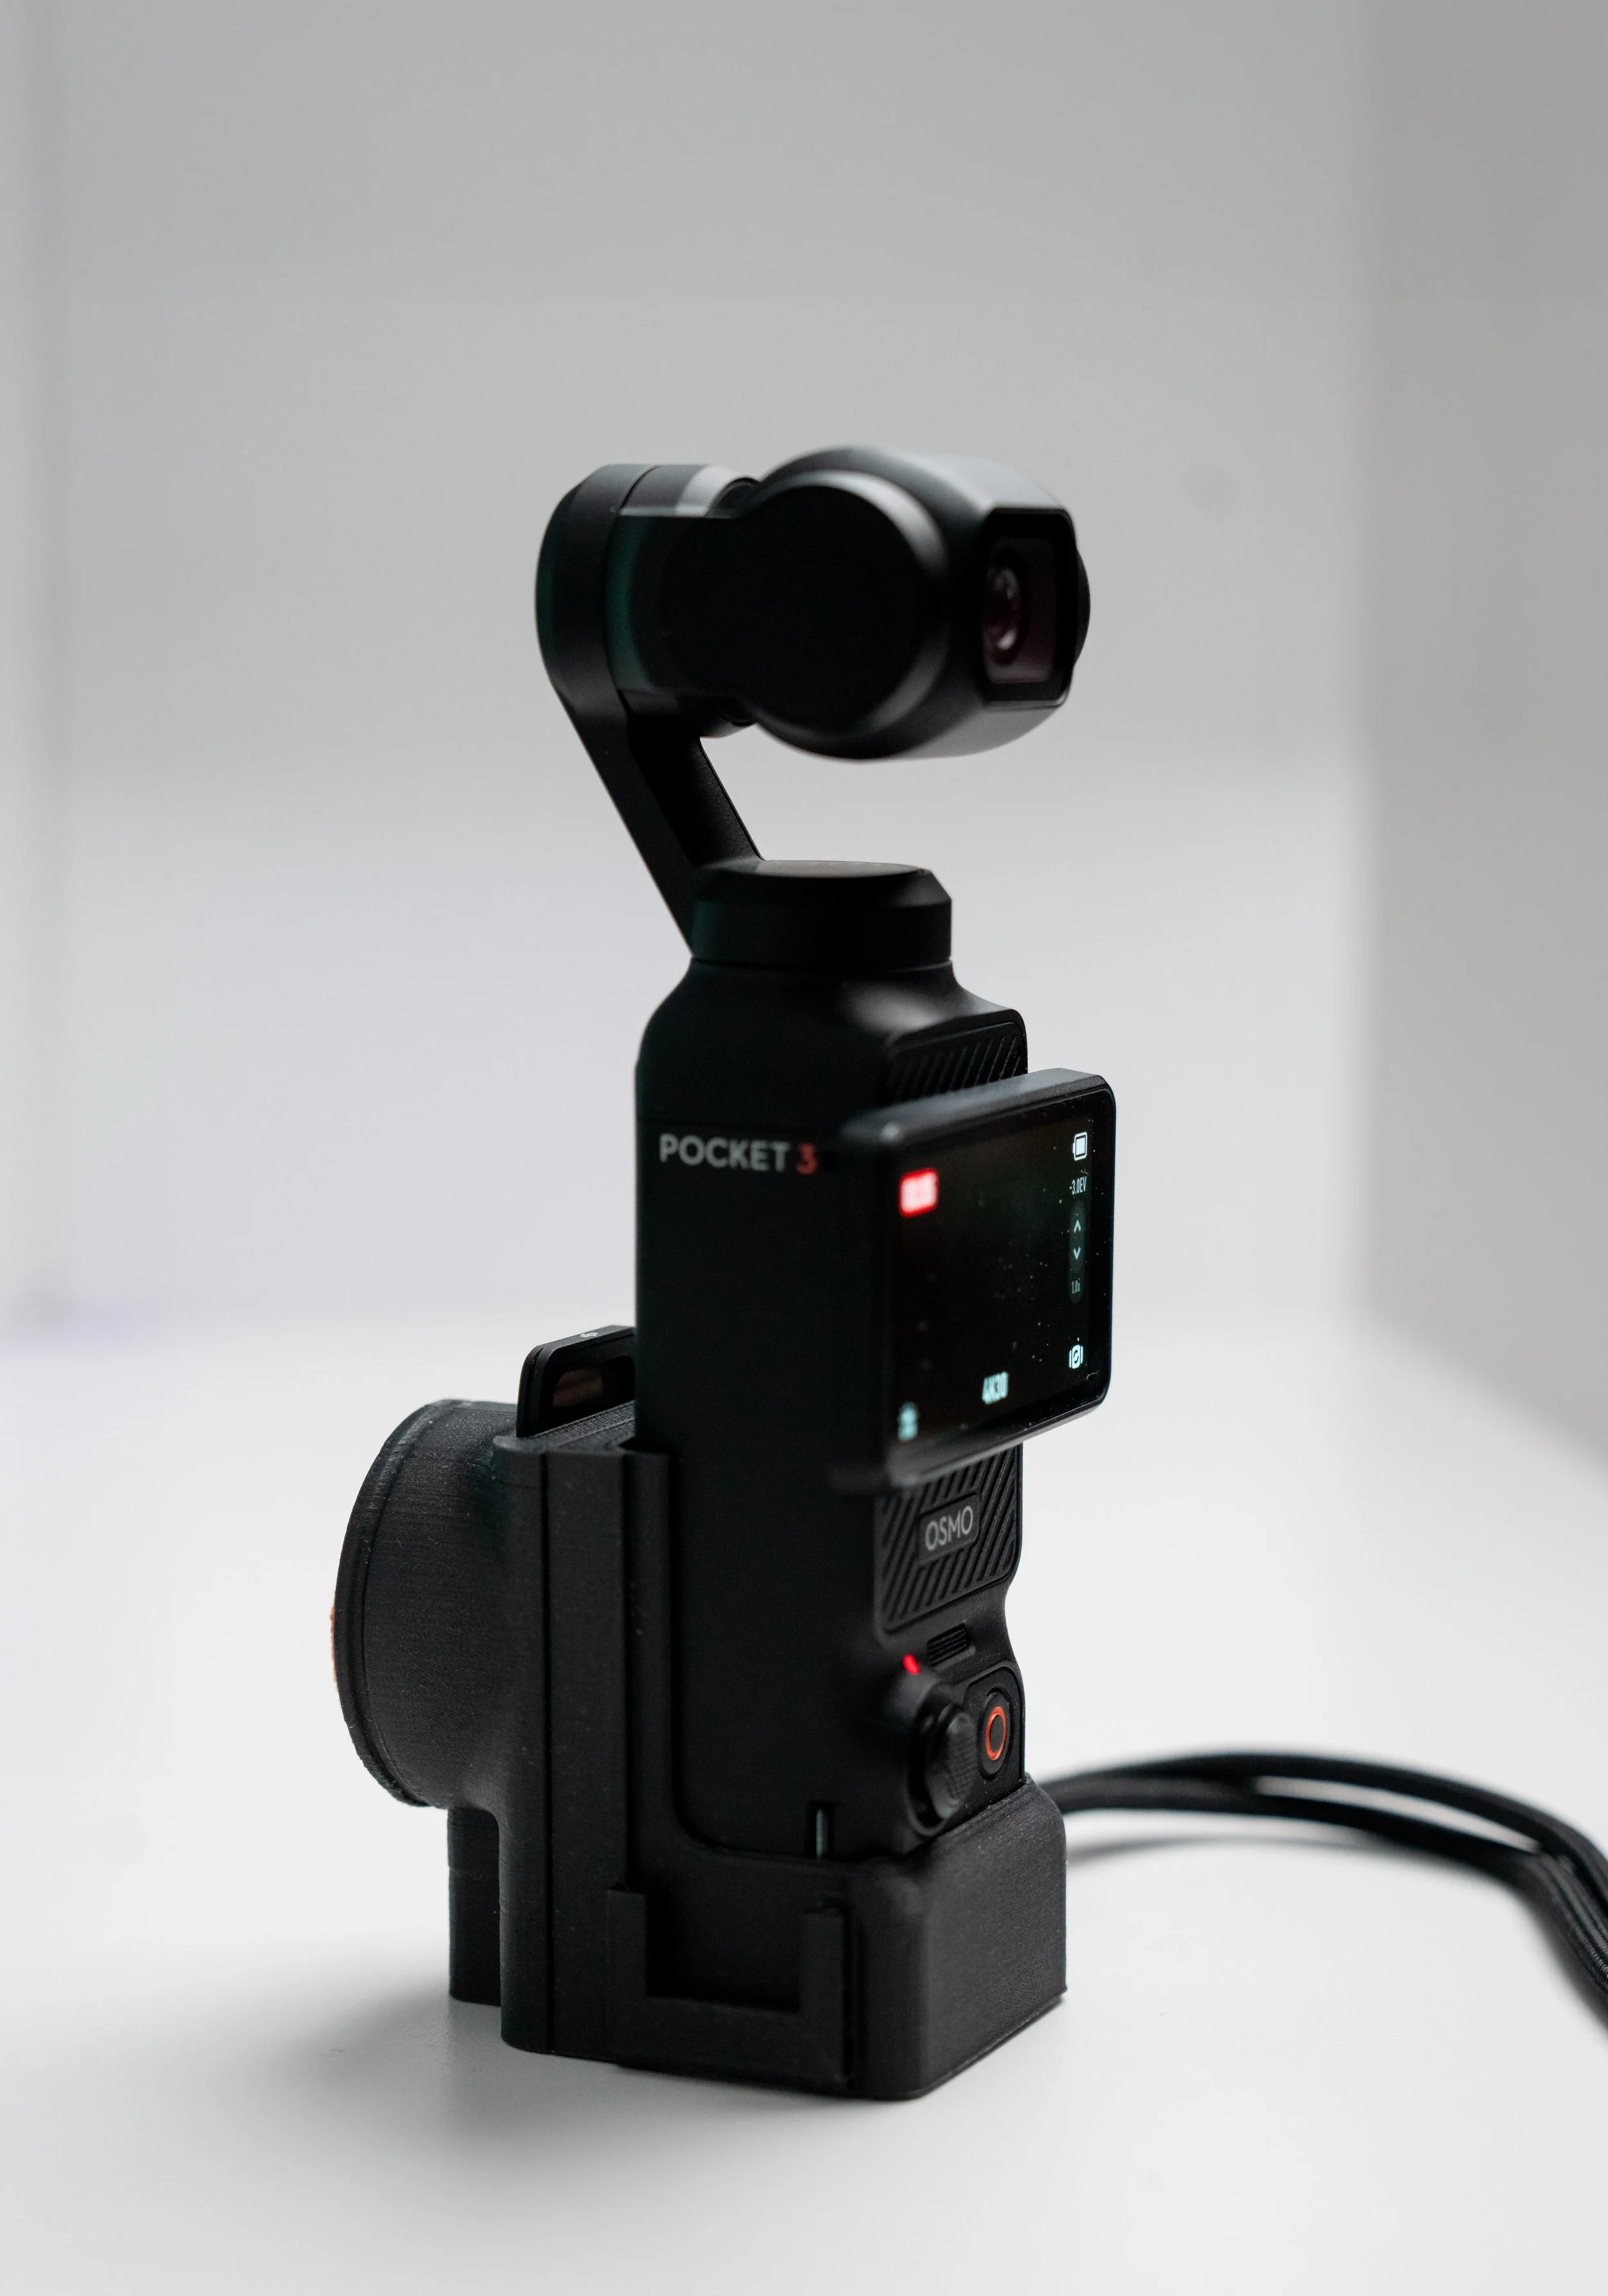
Congratulations! You’ve successfully added a DIY Magnetic AirTag case to your DJI Osmo Pocket 3. This not only adds a layer of security but also ensures that your valuable equipment is always just a ping away.
Note: Always handle electronic components with care to avoid damage. If you run into issues, review the steps to ensure all connections are correct and secure. Enjoy your newly upgraded DJI Osmo Pocket 3!
Feel free to comment below or contact me if you have questions or need assistance with your project. Don’t forget to check out other tutorials on my website for more DIY tech fun!